The book has made its case. What it hasn’t done yet is tell you, plainly, how to run the thing and come away with labels. It turns out to be less work than the argument around it might suggest. There are three parts: what you do before a trip, what you do in the field, and what you do when you get home. Only the first takes any setup.
9.1 Before the field
Before a trip you print two kinds of card. The first is a run of numbered identity cards: your collector code and a sequence of numbers, enough for the days ahead. The second is the observation decks you’ve chosen for the work, a card for each value they hold. You describe a deck as a small table, one row per card, and the software renders it as a sheet of printable cards.
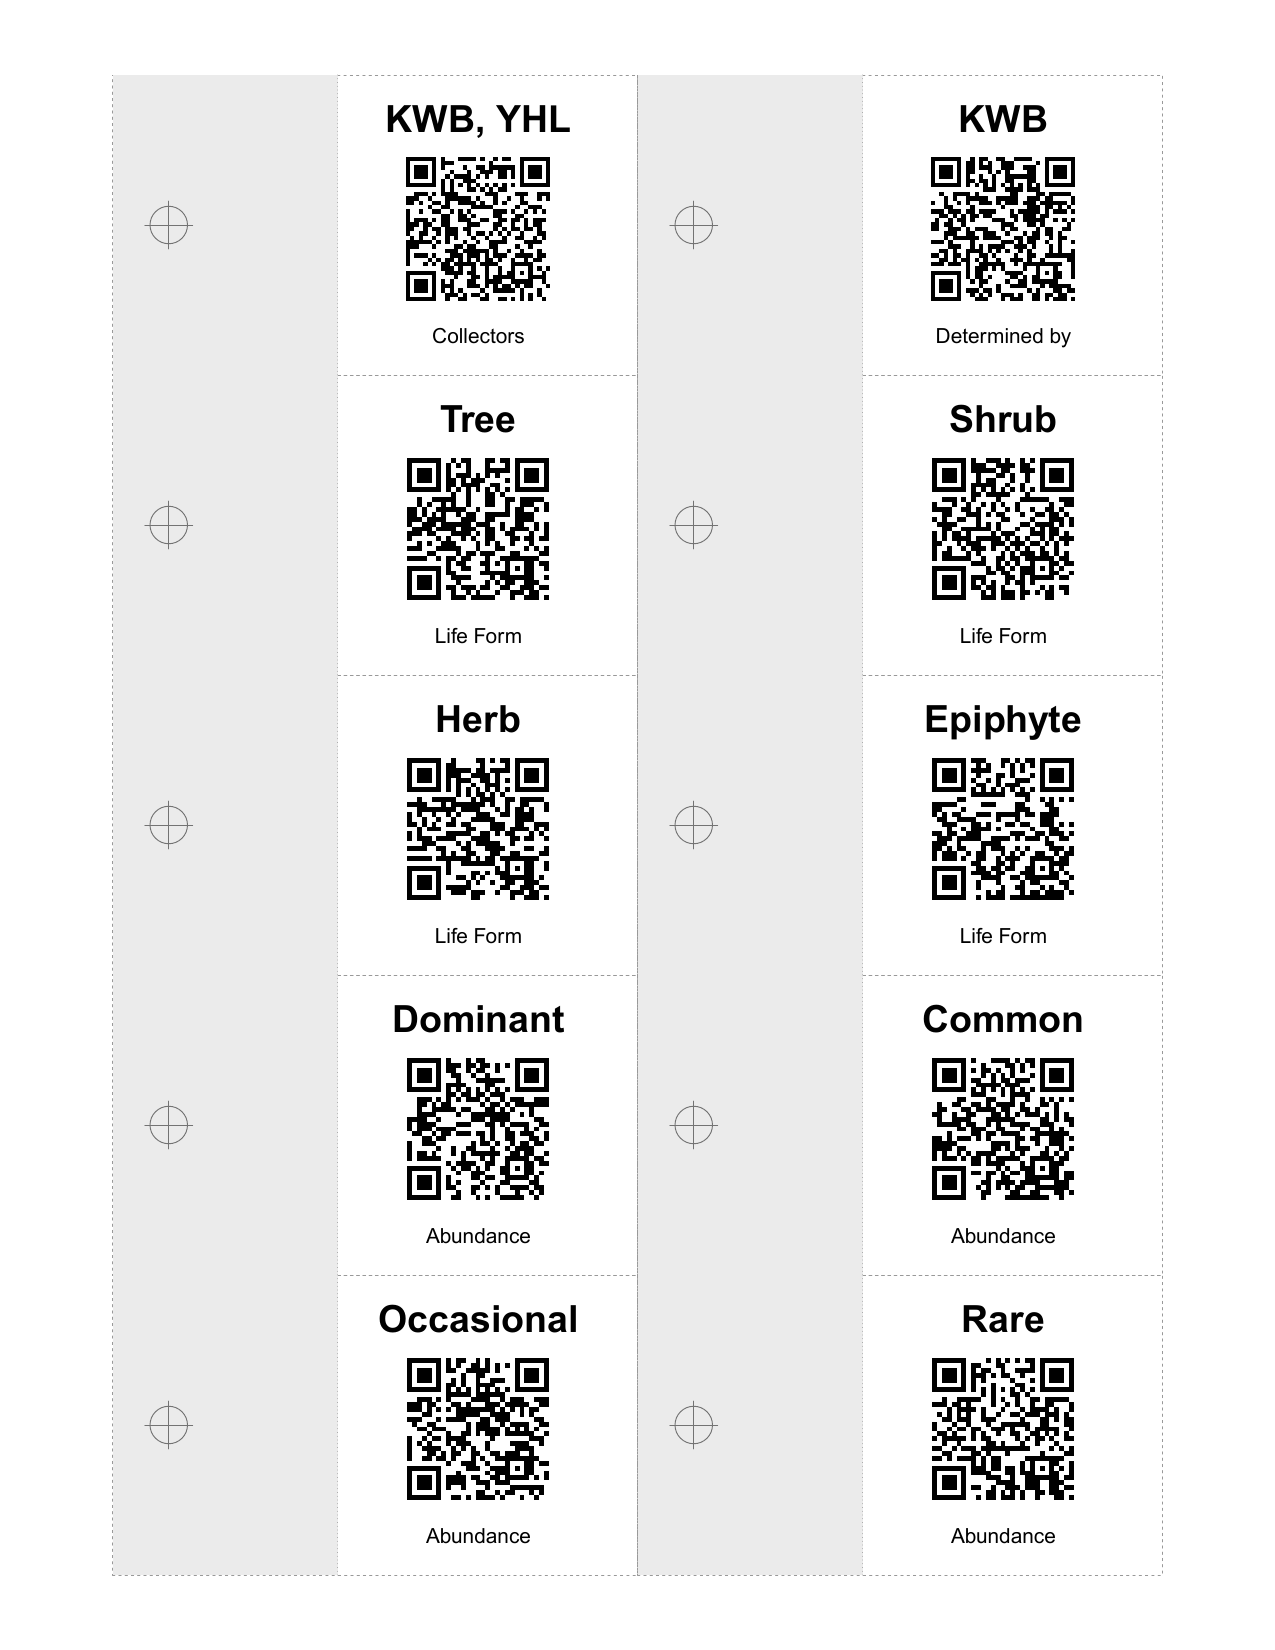
Four columns and one row per card. header is the value printed large, footer is the field name printed under the code, and text is what the code itself carries — written out in full, as finished label text, which is what makes a card readable to a stranger’s phone and to your own eye. The blank field names at the bottom are the comment cards: a printed heading, a code, and space to write.
Figure 9.1: The same table, rendered. Ten cards to a US-Letter sheet of business-card stock, drawn at the true Avery positions rather than by dividing the page into ten equal parts. The outlines, the grey band along each card’s bound edge and the small crosshair are guides, printed here by asking for them so the geometry can be checked against a blank sheet held up to a window; they are off for a real run. Note that nothing is printed in the grey band — that is the clearance the decks chapter is about, and the reason the codes sit right of centre. Obtained from make_qr_cards() with guides = TRUE; the ten codes on this sheet were re-read from the rendered page to confirm they carry their data.
Print the sheets onto business-card stock, ten cards to a page, with page scaling off, since scaling to fit is the commonest reason cards come out misaligned. If you expect wet weather, laminate them. Separate the cards and punch a hole near one end of each. That hole does double duty: a string through it ties an identity card to a specimen, and the same hole spindles a set of cards onto the screw post of an observation deck. Punch every card of a deck in the same place, and stay well inside the reserved band the layout left empty along that edge, because where you put the hole decides how far the fanned stack reaches across the card beneath it, and that reach is the thing the reserve exists to cover. It is worth punching one deck, assembling it, and photographing a card before you punch the rest. Then assemble the kit the way the decks chapter laid out: the observation decks spindled under their colored covers, the number cards and a few blank comment cards in a holder that fits a vest pocket. Individual cards last a long time, but a deck isn’t fixed for good. As your focus or your region shifts, you add cards and retire others. The numbers you reprint for every trip.
9.2 In the field
In the field the routine is the same for every specimen, and it’s quick. Collect the plant, and while it’s fresh, assess it and the place it grew. Then lay the cards out on any flat, lit surface, the identity card first, and rotate each observation deck to the card that fits, adding it to the group. Take one photograph of the whole layout, close to the plant, because the place you take the photograph is the place the camera records, and that coordinate pair is the whole point. Before you move on, glance at the shot to be sure every card is in it and in focus, and if someone is along, let them photograph the layout too, since two copies on two phones cost nothing. Only then tie the identity card to the specimen, a string knotted through its punched hole so it can’t work loose, and drop the tagged specimen into the collection bag. That knot ties the plant to its number, and it’s the bond you most want to keep. Then on to the next plant. You carry no notebook, and you write nothing down.
9.3 At the desk
The desk work is almost none. Drop every photograph from the trip into a single folder. Point the software at the folder and let it run: it reads the cards in each picture, takes the coordinate pair and the time the phone recorded, derives the site from the coordinate pair, and builds one record per specimen. A trip’s worth of photographs becomes a trip’s worth of records in one pass.
Hawaii Capital Historic District, Honolulu County, Hawaii, United States
2
Example_2.jpg
KWB 1243
KW Bridges, YH Lau
KW Bridges
Shrub
No Flowers
Common
Hawaii Capital Historic District, Honolulu County, Hawaii, United States
2
Two photographs in, two rows out, and they are the same specimen. That is not a flaw in the example, it is the redundancy the fragility chapter recommends: the layout was photographed twice, eight seconds apart, and of the sixteen fields the two rows carry, fourteen are identical — every card value, the coordinate to the last digit, and every derived value from locality down to soil. The two that differ are the file name, which has to, and the timestamp, by those eight seconds. That is what a good redundant capture looks like: two independent readings that disagree about nothing that matters.
It does mean a batch over a folder gives you one row per photograph and not one per specimen, so somewhere between the folder and the herbarium you reconcile on the collection number — which is exactly what the collection number is for, and why issuing one twice is the single unrepairable mistake in the whole system.
It is worth saying that both frames gave up all six codes. One of them was the harder arrangement, shot at more of an angle, and an earlier hand-rolled pass over it recovered only five. The difference is not a better camera; it is that the reader tries the image several ways rather than trusting one.
From those records you take what you need. For a herbarium, export them as a Darwin Core file, the plain table of standard columns every herbarium reads, ready to ingest and print on its own archival paper. If you want labels in your own hands, print the provisional labels from the same records. And the full set of records, each placed in space and time, is the starting material for the field log, which the last chapter takes up on its own. One folder of photographs goes in, and a data file, labels if you want them, and the makings of a field log come out.
That is the whole of it. Print the decks once, photograph cards in the field, empty the folder at home. Every hard part was moved to where the light is good, or handed to the software, or removed altogether, and what’s left for the collector is small enough to actually get done. Which, from the very first page, was the entire point. A cautious reader will still be wondering whether something this light can be relied on. That is the right question, and it’s the next one.